Help pages
Viewing Greek text
Example: First Hebrew exercise
Example: Second Hebrew exercise
Example: Third Hebrew exercise
Example: Second Greek exercise
Example: Create a simple Hebrew exercise
Example: Create an advanced Hebrew exercise
Example: Create a simple Greek exercise
Andrews University Final Exam: Hebrew I (OTST551)
Andrews University Final Exam: Hebrew II (OTST552)
Andrews University Final Exam: Advanced Hebrew (OTST625)
Andrews University Hebrew Placement Exam
Hebrew Proficiency Exam for OTST Exegesis classes
Andrews University Final Exam: Intermediate Greek (NTST552)
Andrews University Greek Placement Exam
Viewing a Greek Text
To see Luke 2:1-5 fill out the text selection dialog thus:
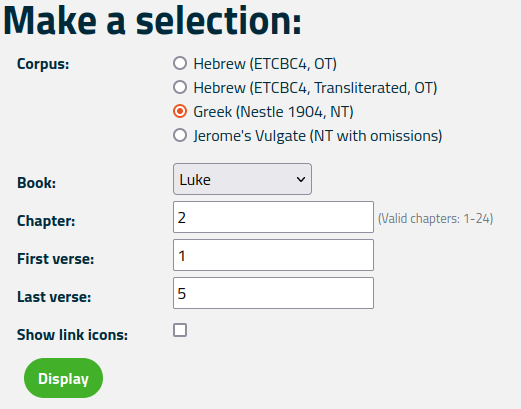
(For information about the “Show link icons” checkbox, see the article “Link icons”.)
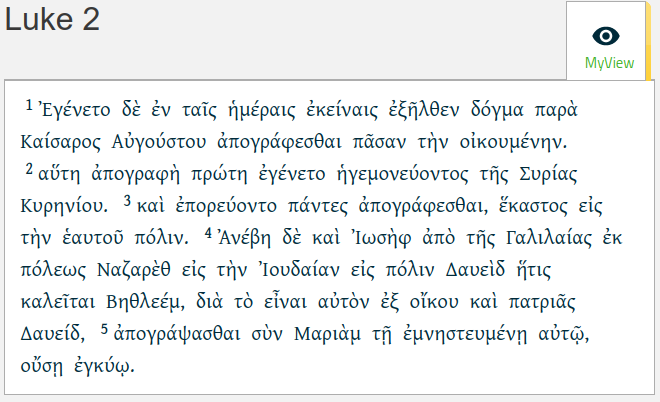
Then click the Display button. This will show you Luke 2:1-5 in Greek:
Viewing Greek Grammar Information
There are different ways to display grammar information:
- Hovering the mouse over a word or sentence part. (This is not available on tablets or smartphones.)
- Clicking a word or sentence part.
- Using the “MyView” selector.
On a computer, you can use your mouse to point to a word in the text (known as letting your mouse “hover” over a word). You will then see a so-called grammar information box. to the right of the text:
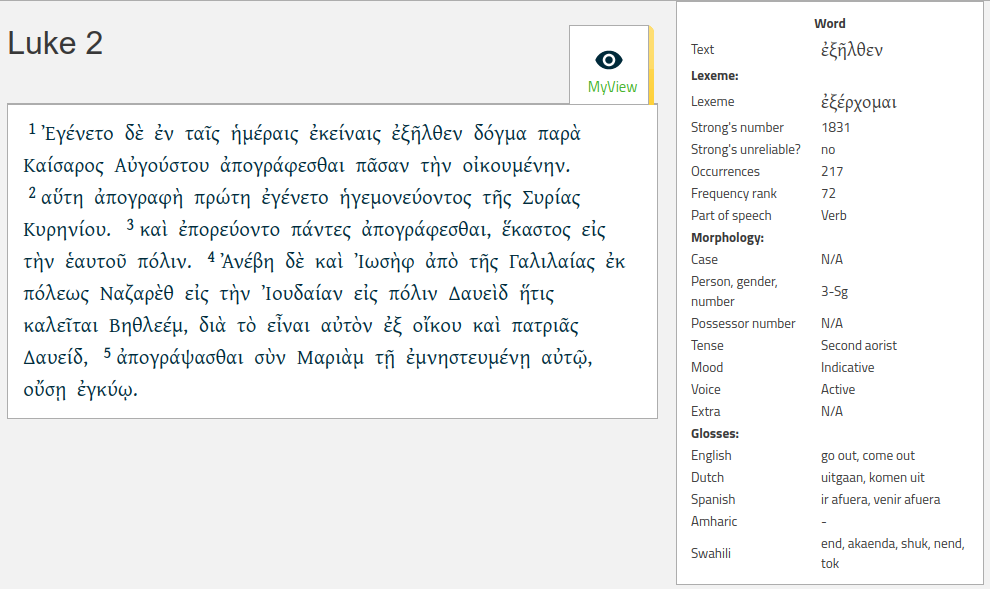
In the grammar information box you will see detailed information about the word your mouse points to. When you move the mouse, the grammar information box disappears. Also, the grammar information box may be too tall to fit on your computer screen. You may find this inconvenient, so instead you can use the following method:
On a computer, table, or smartphone, you can click or tap on a word. In that case, a dialog box will appear containing the grammar information box. (You can click the × at the top of the dialog box or the Close button at the bottom of the box to close the dialog. Alternatively, press the “Esc” key on your keyboard.)
A third way to display grammar information is to use the “MyView” selector as described in the following section.
The “MyView” Selector
Above the Greek text you see an “eye” labelled “MyView”:
 .
If you click the eye icon, the system will show the so-called grammar selection box. At the same
time the eye icon turns into a × icon. The grammar selection box looks like this:
.
If you click the eye icon, the system will show the so-called grammar selection box. At the same
time the eye icon turns into a × icon. The grammar selection box looks like this:

The Greek grammar selection box contains four buttons, identifying the four levels of the grammar hierarchy used by the Greek text: The text contains sentences, which contain level 2 clauses, which contain level 1 clauses, which contain words. You can click on each of these to display relevant grammar information.
If, for example, you click the Word button and then the Lexeme button, the grammar selection box looks like this:

If you now click the Part of speech button, the Greek text changes to look as in the figure below, where you can see the part of speech of each word of the text.

You can add additional information by clicking the relevant buttons in the grammar selection box.
You can use the Clear grammar button to remove all the selected grammar information, and you can use the × icon to hide the grammar selection box.
The grammar selection box also allows you to see borders between clauses or sentences, as well as grammatical information about each of these. If, for example, you click Clause level 1, and then select Show border, you will see the borders of each clause.
By pointing your mouse to the word “Clause1” on the border of a particular Clause (or, alternatively, clicking the word “Clause1”), a grammar information box for the particular clause will be shown:

Some words may not belong to a particular clause, and a clause may be split into parts. In the figure above, the word καὶ at the start of verse 3 is not a member of a clause; and the clause in verse 1 is split into two parts around the word δὲ, which is not part of the clause. The split clause is marked by its missing right and left borders.
In the grammar selection box, under Word and Lexeme you can enter a “Word frequency color limit”. Setting this value to, for example, 50, means that the 50 most common Greek words in the New Testament will be displayed in black, whereas rarer words will be displayed in blue:

If you are learning Greek, you may find this feature useful when deciding if a word is worth memorizing. When determining how common words are, different morphological forms of the same word are counted as one.