Help pages
Example: First Hebrew exercise
Example: Second Hebrew exercise
Example: Third Hebrew exercise
Example: Second Greek exercise
Example: Create a simple Hebrew exercise
Example: Create an advanced Hebrew exercise
Example: Create a simple Greek exercise
Example: Create an advanced Greek exercise
The “Features” tab
Andrews University Final Exam: Hebrew I (OTST551)
Andrews University Final Exam: Hebrew II (OTST552)
Andrews University Final Exam: Advanced Hebrew (OTST625)
Andrews University Hebrew Placement Exam
Hebrew Proficiency Exam for OTST Exegesis classes
Andrews University Final Exam: Intermediate Greek (NTST552)
Andrews University Greek Placement Exam
Edit Exercise - Features
On the “Features” tab you indicate what information you will show to students and what information you want them to provide as answers.
When running an exercise, the program will display a table of information about each question object below the green progress bar under the chosen sentence. For example, thus:
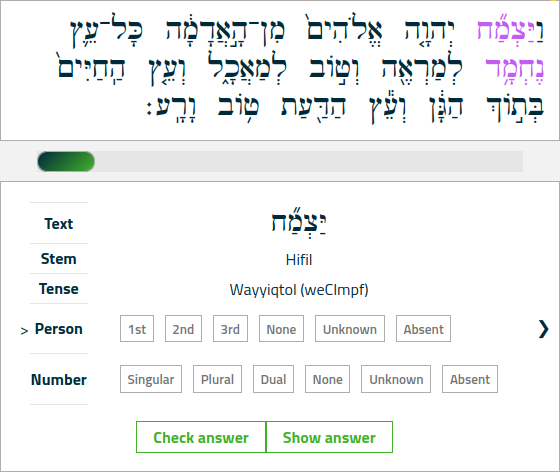
The question objects, which in this example are words, are marked in purple in the sentence, and the information below shows the features text, stem, and tense (the so-called “display features”), and the program asks about person and number (the so-called “request features”).
When creating an exercise, the teacher specifies the display features and request features in the “Features” tab. A portion of the tab may look like this:
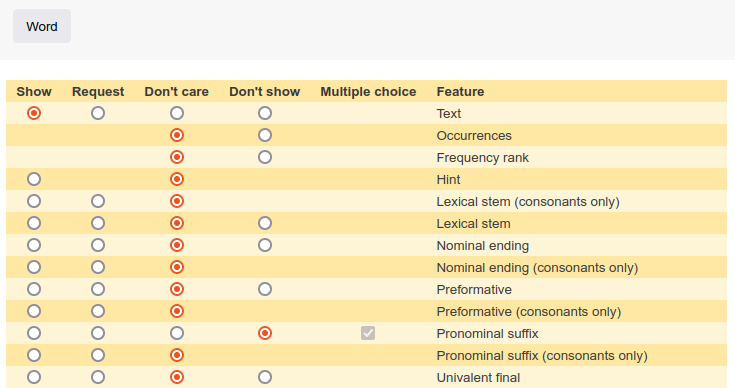
This image shows part of the Features tab used by Hebrew.
If you click the word “Word” above the table, the table collapses and you see only this:

“Word”, ”Phrase”, and ”Clause” are the most important sentence units available in the Hebrew part of Bible OL. If you work with Greek instead, you will see buttons labelled “Word”, ”Clause level 2”, and ”Clause level 1”. The topmost sentence unit (in this example “Word”) is the one specified in the ”Sentence Unit” tab.* In the following text, we will refer to the topmost sentence unit as the “primary” sentence unit, and the other sentence units as ”secondary” sentence units.
If you click the primary sentence unit (“Word” in this example), the table unfolds again, and you see the list of available features. Here you can place marks in the five columns to indicate how each feature should behave when the exercise is run.
The text feature is always at the top. The text feature refers to the actual characters that make up the sentence unit. This may include punctuation marks.
You can select the following options for each of the features of the primary sentence unit:
- Show
- Select this option to make this a display feature. This value of this feature will be displayed for each question object
- Request
- Select this option to make this a request feature.
- Don’t care
- Select this option if you neither want to display nor request the feature from the student. The student can, however, choose to display the feature in the usual manner by letting the mouse hover over a word or using the “MyView” selector.
- Don’t show
- Select this option if you neither want to display nor request the feature from the student, and you want to prevent the student from seeing this feature using other means.
- Multiple choice
- This option is available for a few features in Hebrew. If you select this option, the student will not be required to type the Hebrew word; instead multiple choice options will be presented.
Some options may not be available for all features. For example, in the picture above, the “Hint” feature must be either Show or Don’t care.
When creating an exercise, you can choose to make the exercise easier for the student by limiting the number of possible answers for certain features. Consider, for example, the question at the top of this page. For “Person” the student can choose between 1st, 2nd, 3rd, None, Unknown, and Absent; and for “Number” the student can choose between Singular, Plural, Dual, None, Unknown, and Absent. Some of these values may confuse the student, and therefore a teacher can limit the options.
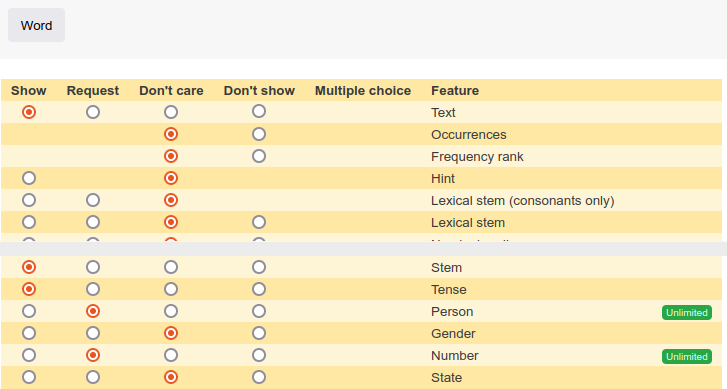
When you indicate that a certain feature should be a request feature, a green button labelled “Unlimited” may appear:
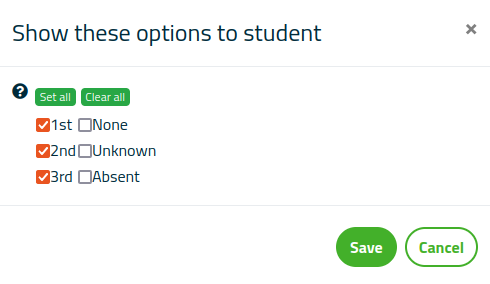
If you click on the “Unlimited” button next to the “Person” feature, this dialog will appear:
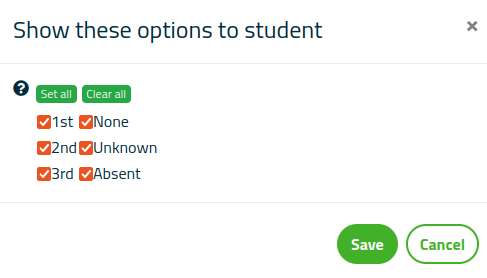
In the dialog you indicate which feature values should be presented to the students. You can use the “Set all” and “Clear all” buttons to set or remove all the check marks. Let us assume that you remove the checkmarks next to None, Unknown, and Absent:
When you press the “Save” button, you return to the feature table and the green “Unlimited” button has turned into a red button labelled ”Limited”. Let us further assume that you limit the “Number” feature to only the values Singular and Plural. Now, when the exercise is run, a question may look like this:
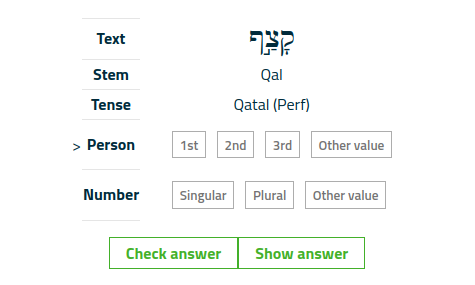
You can see that all the disabled values have been combined into a single Other value.
Below the features for the primary sentence unit on the “Features” tab, you find a number of other sentence units. If you click one of these, a corresponding feature list will appear, for example this:
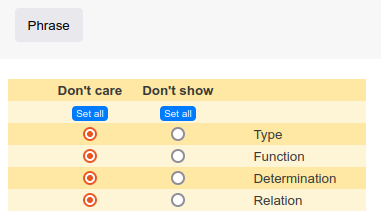
In this illustration we are working with a Hebrew exercise whose primary sentence unit is a Word, and we have clicked on the “Phrase“ button. Here, the only possible choices are Don’t care and Don’t show. The blue buttons labelled “Set all” can be used to quickly specify a choice for all features.
Below all the secondary sentence units you will find a button labelled “Gloss limit”. If you click it, this text will appear:
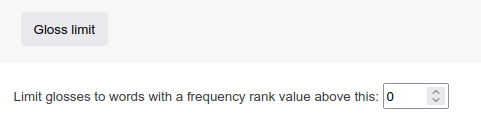
If you set this value to, for example, 40, glosses for the 40 most common words (lexemes) will not be available to the student.