Help pages
Example: First Hebrew exercise
Example: Second Hebrew exercise
Example: Third Hebrew exercise
Example: Second Greek exercise
User management
Example: Create a simple Hebrew exercise
Example: Create an advanced Hebrew exercise
Example: Create a simple Greek exercise
Andrews University Final Exam: Hebrew I (OTST551)
Andrews University Final Exam: Hebrew II (OTST552)
Andrews University Final Exam: Advanced Hebrew (OTST625)
Andrews University Hebrew Placement Exam
Hebrew Proficiency Exam for OTST Exegesis classes
Andrews University Final Exam: Intermediate Greek (NTST552)
Andrews University Greek Placement Exam
User Management
Users with facilitator privileges can add, modify, and delete user accounts, except accounts belonging to system administrators and other facilitators.
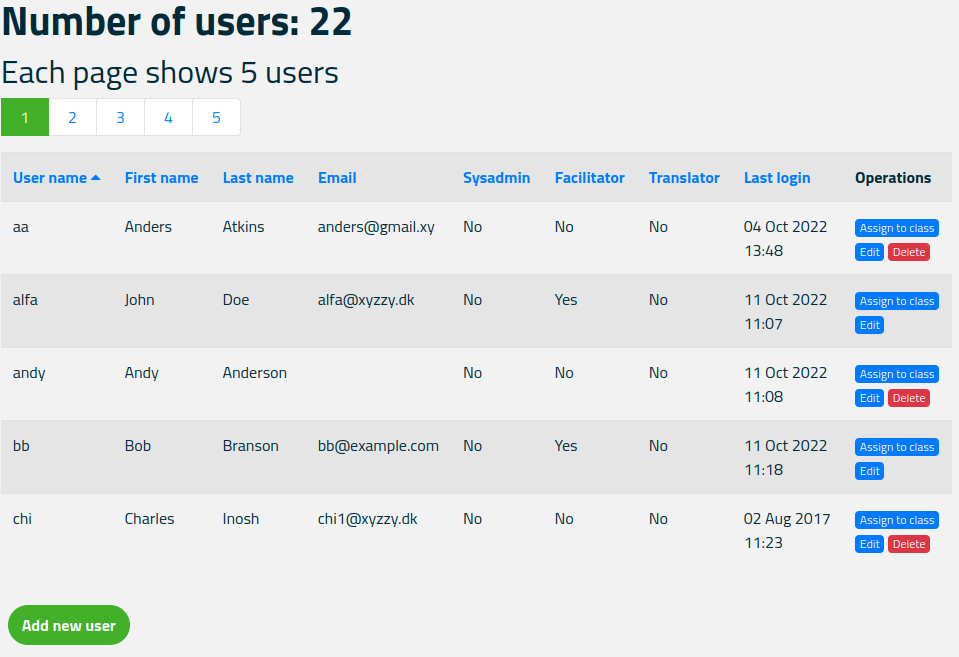
To open user management, select Administration > Users. You will then see a table that looks something like this:
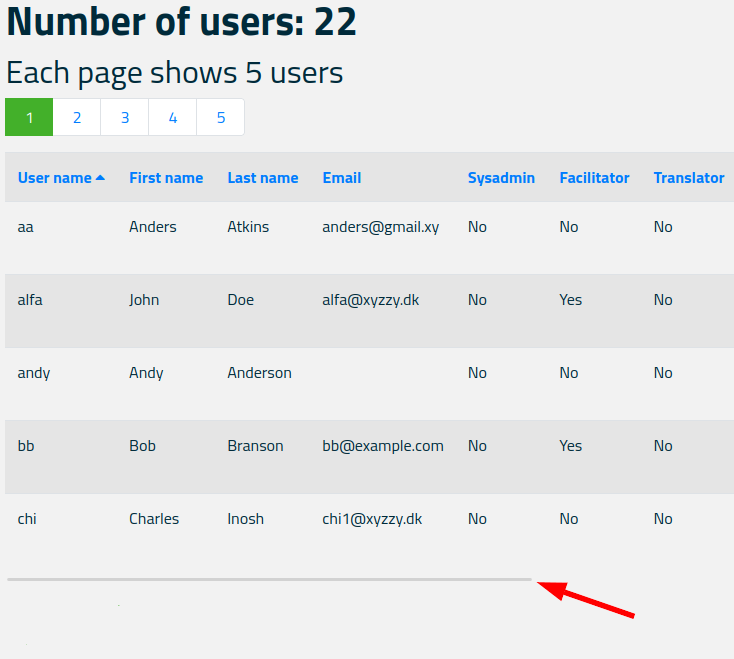
The table can be quite wide (and is not suitable for managing on a handheld device). If the table is wider than your browser window, you can drag the bar indicated by the arrow below to scroll left and right:
The figures above show one page of the list of users. The number of users on each page is configured inside Bible OL and although the number is five in the illustrations above, the actual number is typically larger than five . Below the text “Each page shows ... users”, you see a page selector. Clicking on one of the numbers there takes you to that page.
The small triangle ⏶ next to the heading “User name” indicates that the table is currently sorted by ascending user name. If you click on “User name”, the triangle changes to ⏷ and the table will be sorted by descending user name. You can click on any of the other blue headings to sort the table by that value.
To the right of each user there are buttons that allow you to assign the user to a class, edit the user’s profile, or delete the user. (In the above example, you cannot delete user John Doe because he has facilitator privileges like you.)
The “Add new user” button at the bottom allows you to add a user account. In this case the user does not need to have an email address.
Enrolling Students in a Class
There are three ways to enroll students in a class: The students can enroll themselves, or the teacher can enroll them through the User Management menu discussed here or through the Class Management menu.
To enroll students in your class using the menu we are discussing here, press the “Assign to class” button. This will show you a list of all your classes. Here you can add or remove the selected student from your classes. The “Enroll before” date of your class does not affect your ability to enroll students in your own class.
If you want to prevent students from enrolling themselves in a class, see the page on Class Management.

